
Get xbot running in under 5 minutes.
NoteSystem requirements: Any modern OS (Linux, macOS, Windows). No pre-installed dependencies needed — the installer downloads a static binary.
# Linux / macOS
curl -fsSL https://raw.githubusercontent.com/ai-pivot/xbot/master/scripts/install.sh | bash

# Windows (PowerShell)
irm https://raw.githubusercontent.com/ai-pivot/xbot/master/scripts/install.ps1 | iex
The installer downloads the xbot-cli binary, generates a random admin token,
writes ~/.xbot/config.json, then runs xbot-cli setup to install the Web UI
and every built-in plugin and enable the web channel — in both modes, so the
browser works right away.
NoteBehind a firewall (China)? Use the mirror-accelerated installer:
curl -fsSL https://ghfast.top/https://raw.githubusercontent.com/ai-pivot/xbot/master/scripts/install-cn.sh | bash
TipRather not do it yourself? Paste this into your AI agent — it installs and verifies on its own:
Install and start xbot on this machine:
1. curl -fsSL https://raw.githubusercontent.com/ai-pivot/xbot/master/scripts/install.sh | bash
2. xbot-cli setup --check     # exit code 0 means a complete install
3. nohup xbot-cli serve >/tmp/xbot.log 2>&1 &
4. curl -s -o /dev/null -w '%{http_code}' http://127.0.0.1:8082   # must print 200
If anything fails, read https://ai-pivot.github.io/xbot/installation/ (Troubleshooting).
The installer asks you to pick:
| Standalone | Server | |
|---|---|---|
| Architecture | CLI runs the agent locally | Background server + CLI connects remotely |
| Best for | Solo developer | Teams, multi-channel |
| Channels | CLI only | Feishu · QQ · Web · CLI |
| LLM sharing | Each user configures | Admin configures once, everyone uses |
| Persistence | Stops when terminal closes | System service, auto-start |
Most teams should choose Server mode. Pick Standalone for a quick solo test drive.
Server mode enables the web channel ("web": { "enable": true, "port": 8082 }
in ~/.xbot/config.json). Browse to http://localhost:8082 and click
Create account — the first registration becomes the operator account.
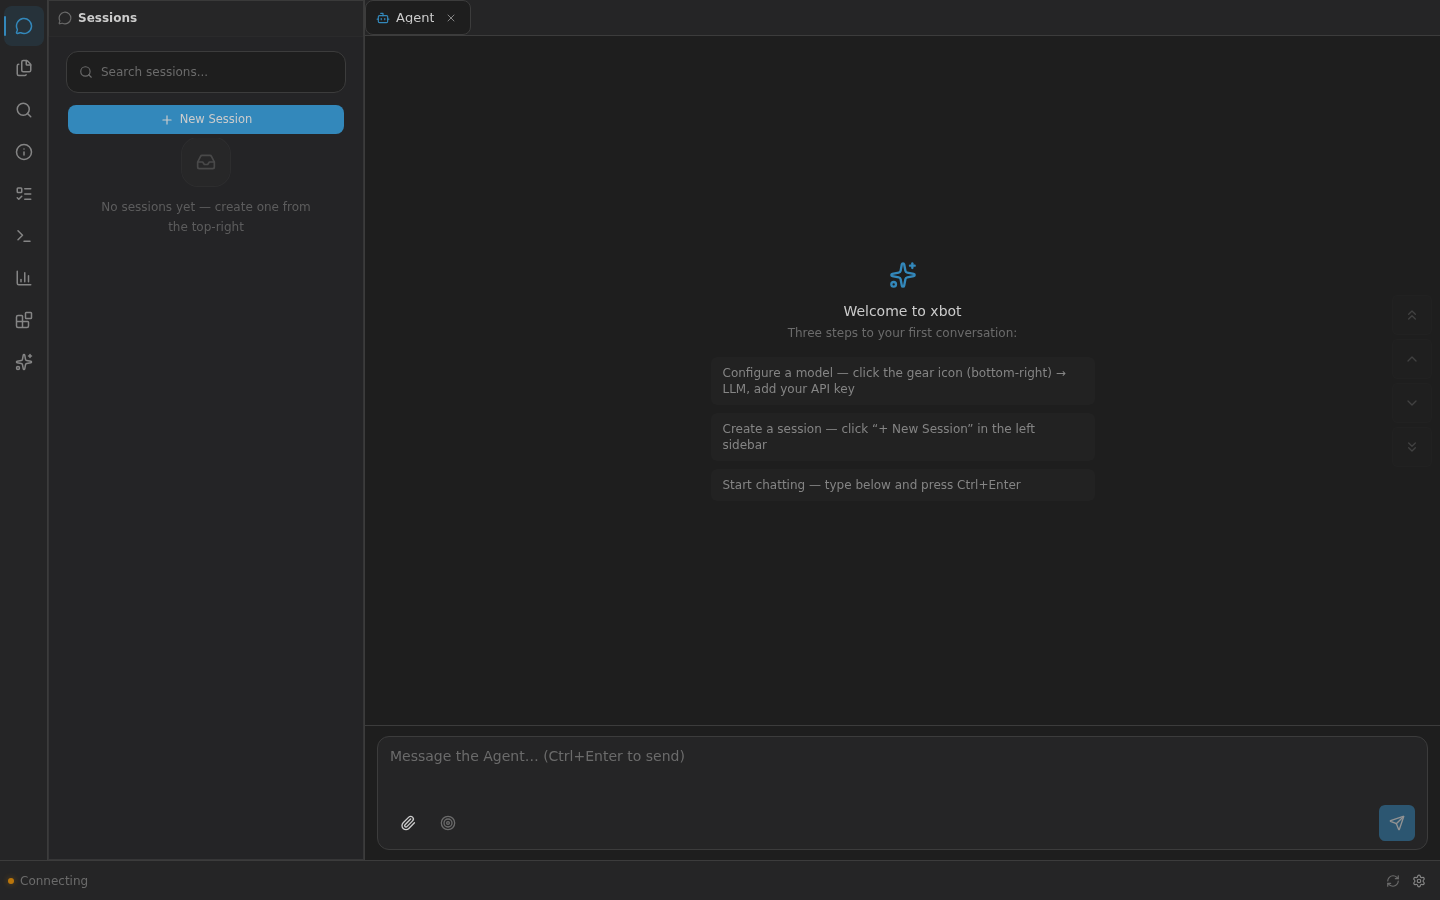
The empty workspace shows a three-step guide: configure a model, create a session, start chatting.
Run xbot-cli. The first launch opens a Setup wizard:
- Choose an LLM provider (OpenAI / Anthropic / OpenAI-compatible)
- Enter your API key
- Set the API base URL (change this for DeepSeek, Qwen, Ollama, etc.)
- Pick a model
- Configure model tiers (Vanguard / Balance / Swift — used for different scenarios)
Re-run the wizard anytime with /setup or Ctrl+K → Setup.
Subscriptions, not a single global key. xbot uses a subscription system. You can create multiple subscriptions (e.g. work Claude, personal DeepSeek) and switch between them per session.
TipUsing DeepSeek, Qwen, or Ollama? Setprovider: "openai"and change thebase_urlin the Setup wizard. xbot works with any OpenAI-compatible API.
You’re ready. Type a message and press Enter. The agent can call tools, run commands, search the web, and delegate to sub-agents.
You: What files are in this directory?

Agent: *uses Shell tool to run ls*
Agent: The current directory contains...

You: Read the README.md and summarize it

Agent: *uses Read tool*
Agent: This project is about...

You: Create a new file called notes.txt with today's date

Agent: *uses FileCreate tool*
Agent: Done! Created notes.txt with today's date.

You: Search the web for the latest Go release

Agent: *uses WebSearch tool*
Agent: The latest Go release is...
The agent picks the right tool for the job — you just describe what you want.
Type / to see all slash commands. A few essentials:
| Command | What it does |
|---|---|
/setup | Reconfigure LLM, sandbox, theme |
/context | Inspect token usage |
/clear | Clear only the current TUI display |
/new | Archive memory and reset the current conversation |
/sessions | Open the Sessions panel |
/settings | Open settings panels |
/help | Show all commands |
| Shortcut | Action |
|---|---|
Ctrl+K | Command palette (fuzzy search) |
Ctrl+N | LLM panel (switch model + manage subscriptions: add/disable/delete) |
Ctrl+T | Sessions list |
Ctrl+O | Expand/collapse tools |
Ctrl+J | Newline in input |
Ctrl+C | Cancel current operation |
- Installation guide — build from source, service management
- Configuration reference — every
config.jsonfield - Channels — Feishu, QQ, Web setup
- Features — tools, skills, sub-agents, MCP, plugins
- Sandbox guide — Docker sandboxing
- Architecture — how it all fits together