
The CLI is xbot’s default channel — a full-featured terminal user interface (TUI) built with Bubble Tea. It’s the most powerful way to interact with the agent.
The CLI runs the agent directly on your machine. No server needed.
xbot-cli                # Launch interactive TUI
xbot-cli "your question" # One-shot Q&A
echo "question" | xbot-cli  # Pipe mode
The CLI connects to a server over WebSocket. The agent runs server-side.
# Use the auto-configured connection from the installer
xbot-cli

# Manually point to a server
xbot-cli --server ws://your-server:8082
In Remote mode, your CLI shares the same Agent instance with other CLI users, Feishu users, and web users.
On first run, a setup wizard launches automatically. Re-run it anytime with
/setup.
WarningInput box tip: Use arrow keys to highlight the input field → press Enter to enter edit mode → type your text → press Enter again to confirm. Typing without entering edit mode has no effect.
Type these in the TUI:
| Command | Description |
|---|---|
/setup | Re-run the configuration wizard |
/settings | Open settings panels (sandbox, memory, etc.) |
/channel | Channel configuration panel — visually manage Web/Feishu/QQ/NapCat channels |
/model | View or switch the current LLM model |
/models | List available models |
/context | Inspect token usage |
/clear | Clear conversation and memory |
/new | Start a new conversation |
/sessions | List or switch sessions |
/rewind | Rewind the conversation |
/help | Show all commands |
The CLI supports 9 built-in color schemes. Switch via the Setup wizard or
/settings:
midnight · dracula · catppuccin · nord · gruvbox · tokyo ·
rose · rosepine · default
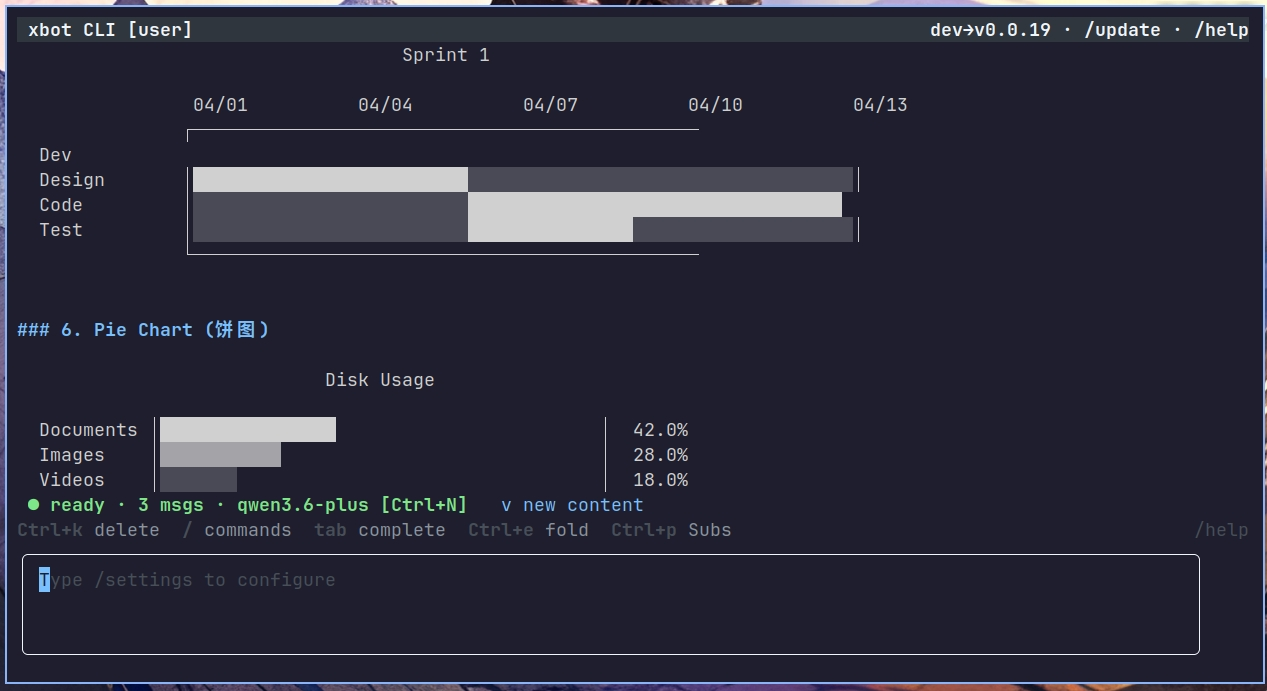
The TUI renders markdown, syntax-highlighted code blocks, and Mermaid diagrams inline:
| Shortcut | Action |
|---|---|
Enter | Send message (or enter/confirm edit in input fields) |
Ctrl+C | Cancel current generation |
Ctrl+D | Quit |
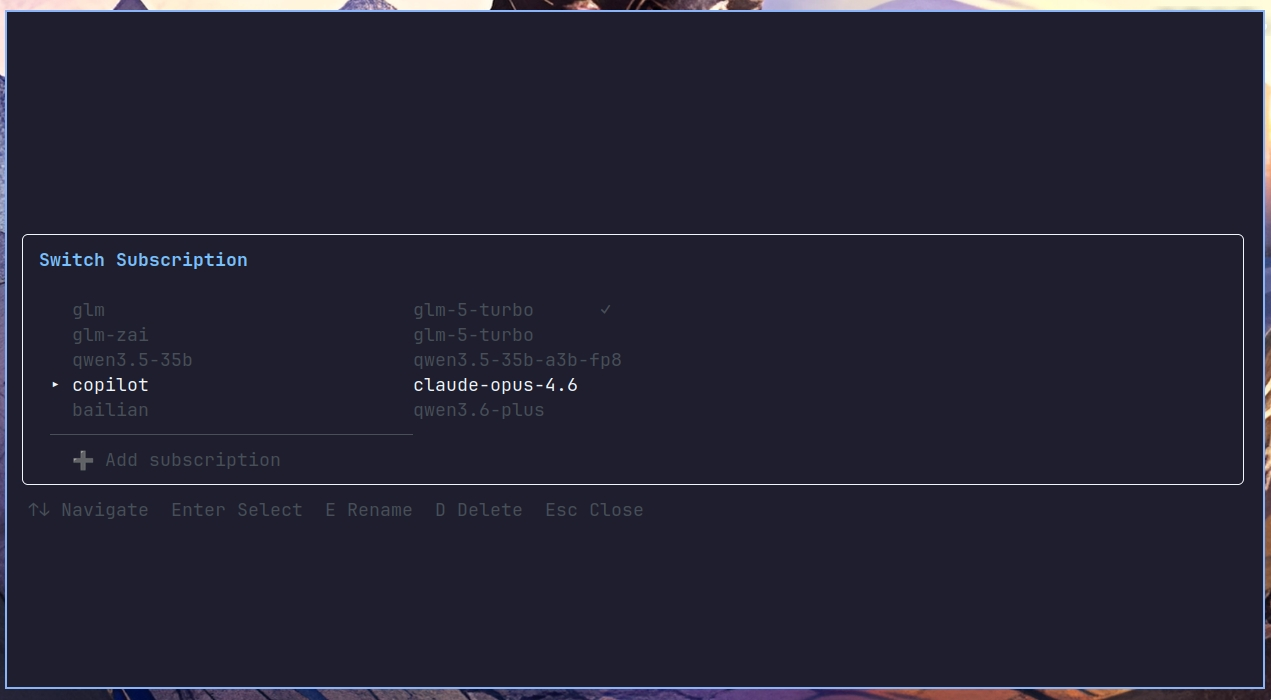
Ctrl+K | Open command palette |
Ctrl+P | Quick subscription switch |
Ctrl+T | Open session panel |
Ctrl+N | Next model |
Ctrl+E | Expand/collapse long messages |
Ctrl+O | Expand/collapse tool summaries |
Ctrl+J | Insert newline |
↑ / ↓ | Scroll through history |
Tab | Auto-complete slash commands |
^ | Open background task panel (when tasks are running) |
/ | Start typing a slash command |
| Shortcut | Action |
|---|---|
↑ / ↓ | Navigate options |
Enter | Select / confirm |
Esc | Close panel / return to parent panel |
Ctrl+C | Force-close panel |
Mouse wheel | Scroll panel content |
| Shortcut | Action |
|---|---|
Enter | Edit selected item (toggle / dropdown / text input) |
Ctrl+S | Save settings |
Esc | Close panel |
Space | Switch dropdown to custom input |
From the Settings panel, you can enter sub-panels (Runner config, Danger zone).
Press Esc to return.
Panels support push/pop navigation. Entering Panel B from Panel A means Esc
returns to A, not directly to the main view:
Settings → Runner config (Esc → back to Settings)
Settings → Danger zone (Esc → back to Settings)
The CLI supports mouse interaction:
| Action | Description |
|---|---|
| Click | Select options, buttons, toggle switches |
| Scroll wheel | Scroll panels or chat history |
| Click input | Focus the text input area |
In the AskUser split panel, the scroll wheel auto-routes based on position:
- Scrolling in the upper chat area → browse message history
- Scrolling in the lower Q&A area → scroll question content
When the agent needs user input, an AskUser split panel appears:
┌─ Chat History (scrollable) ────────────────────┐
│ ... history ...                                  │
├─ AskUser Panel ────────────────────────────────┤
│ ❓ Please choose an option:                      │
│                                                  │
│   ☑ Option A                                     │
│   ☐ Option B                                     │
│   ☐ Option C                                     │
│   ▸ Other: [custom input________]                │
│   ▸ [Submit]                                     │
└──────────────────────────────────────────────────┘
| Shortcut | Action |
|---|---|
↑ / ↓ | Move cursor between options |
Space | Toggle checkbox |
Enter | Toggle checkbox / submit (on Submit button) |
←→ / Tab | Switch question tabs (multiple questions) |
Ctrl+S | Submit directly |
Esc | Cancel |
Mouse wheel | Scroll Q&A content |
Shift+↑↓ | Scroll chat history above |
The title bar shows current operation hints, and the bottom bar displays scroll progress. The cursor auto-scrolls the content when it reaches the panel edge.
Press ^ (caret) to open the background task panel when tasks are running:
| Shortcut | Action |
|---|---|
↑↓ | Select task |
Enter | View task log |
Del | Terminate task |
Esc | Return to list / close panel |
Manage multiple conversation sessions:
| Shortcut | Action |
|---|---|
↑↓ | Select session |
Enter | Switch to session / view message preview |
Del | Delete session (confirmation required) |
Esc | Return to list / close panel |
While the agent is working, the TUI shows live updates:
- Thinking state: dynamic reasoning indicator during deep thought
- Tool calls: execution status and result summary for each tool
- Iteration progress: current iteration number and completed tools
- Streaming output: agent’s reply rendered character by character
Use Ctrl+O to expand/collapse tool execution summaries, and Ctrl+E to
expand/collapse long messages.
The TUI always displays the most relevant shortcuts in the bottom bar, adapting dynamically to context:
- Idle: command palette, auto-complete, subscription switch, etc.
- Processing: cancel operation
- In panel: panel-specific hints (e.g., Ctrl+S to save in Settings)
The hint bar is clickable (mouse), providing quick access to /session,
Ctrl+K, Ctrl+N, and more.
xbot’s agent can adjust its own TUI configuration and interface using built-in tools:
| Tool | Capability |
|---|---|
config | AI reads/writes xbot config (theme, layout, subscriptions, etc.); takes effect at runtime |
tui_control | AI controls the TUI: switch/close sessions, adjust sidebar width, switch themes, execute slash commands |
Typical scenario: you say “switch my theme to dracula and make the sidebar
a bit narrower” → the agent calls config set theme dracula + tui_control set_layout sidebar_width 25 → the UI changes instantly.
- CLI Reference — complete keyboard shortcuts and commands
- Tips & Tricks — power-user tips
- Getting Started — quick start guide